Working with LiDAR data in R
For this example we are going to use the lidR package. Additionally, we are going to load terra sf and dplyr. In this example, we will work with lascatalogs, which enables working with several las files at once.
The first thing is to load the LiDAR data as a catalog and load a shapefile with the areas of interest (that can correspond to in-field measurements). Reading data as a catalog enables refering to the original files without loading all of them into memory.
library(lidR)
library(terra)
library(sf)
library(dplyr)

# Load files
archivos<-list.files(".",
    pattern="*.las",
    full.names=T)
lidares<-readLAScatalog(archivos)

# Load plots data
ptos <- read.csv("Data/Plots.csv")
Since ptos is a csv table, first we need to transform it to an sf object and then project it in the same crs as the LiDAR data (EPSG:32615). So lets do that by first indicating the crs in which the coordinates in the original table are and then transforming them to the target EPSG and then create a buffer of radius = 10 m. We also can select only the columns of interest and rename it.
ptos <- st_as_sf(ptos,
                  coords = c("Easting_Geo", "Northing_Geo"),
                  crs = 4326) |>
  st_transform(32615) |>
  st_buffer(10) |>
  select(Id_parcela) |>
  rename("PLOT_ID" = "Id_parcela")
Now, lets check if everything is ok. First, lets run some tests to see if everything is ok.
las_check(lidares)Now let’s check if both datasets have the same crs and overlap. In this case, I will select a single property of the sf object named “Id_parcela”.
plot(lidares)
plot(ptos["Id_parcela"], add = T)
You should see something similar to the following image:
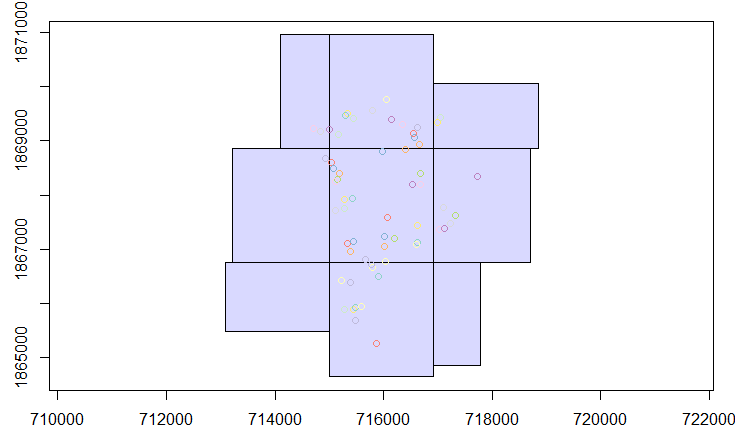 Example of spatial overlap between the liDAR data and field plots.
After making those tests, we are ready to process the data.
Since we are working with a LAScatalog, in order to calculate the metrics of interest we can focus to work with only the places where we have field data (ptos). Thus, we can clip the field data plots to the las catalog. There could be plots that do not fall inside the LiDAR data, so we can filter just to stay with the ones that have LiDAR associated data.
ext_lidares <- ext(lidares)
ptos <- st_crop(ptos,
                ext_lidares)
The next step is creating a digital terrain model (DTM) using a knn nearest neighbor algorithm. Here you can select another algorithm such as knnidw, tin and kriging.
dtm <- rasterize_terrain(lidares,
                         res = 1,
                         algorithm = knnidw(k = 6L, p = 2))
plot(dtm)
Then we can use the DTM to subtract those values to the vegetation points in order to get the vegetation height values. This is usually known as normalization. Here we need to set additional options to process chunks.
# Set output for normalized data, here I will use a files folder
opt_chunk_size(lidares) = 0
opt_output_files(lidares) <-  paste0("files", "/{*}_norm")
nlas <- normalize_height(lidares,
                         algorithm  = tin(),
                         dtm = dtm)
The next step is to get the point cloud metrics by plot. In this case, we are going to use the default std metrics from z. Here you can set any function using the folowing notation: ~list(q10 = quantile(Z, probs = 0.10),q95 = quantile(Z, probs = 0.95)). Before running the following code, we need to change the options to export the files produced for each plot. Here I will use the pattern “ID” to get each file with a consecutive number.
opt_output_files(nlas) <-  paste0("files", "/{ID}")
metrics <- plot_metrics(nlas,
                        .stdmetrics_z,
                        ptos)
Finally, you will obtain a data frame with the plot’s ID and its corresponding z- metrics.